Using Asset Packs
All assets required by kheljs application should be placed inside the assets/ folder of your project. You can manully place asset files in this folder and load them from your game. However this approach soon becomes unmanagable when you have to add assets from different sources and you have to manage a lot of asset files.
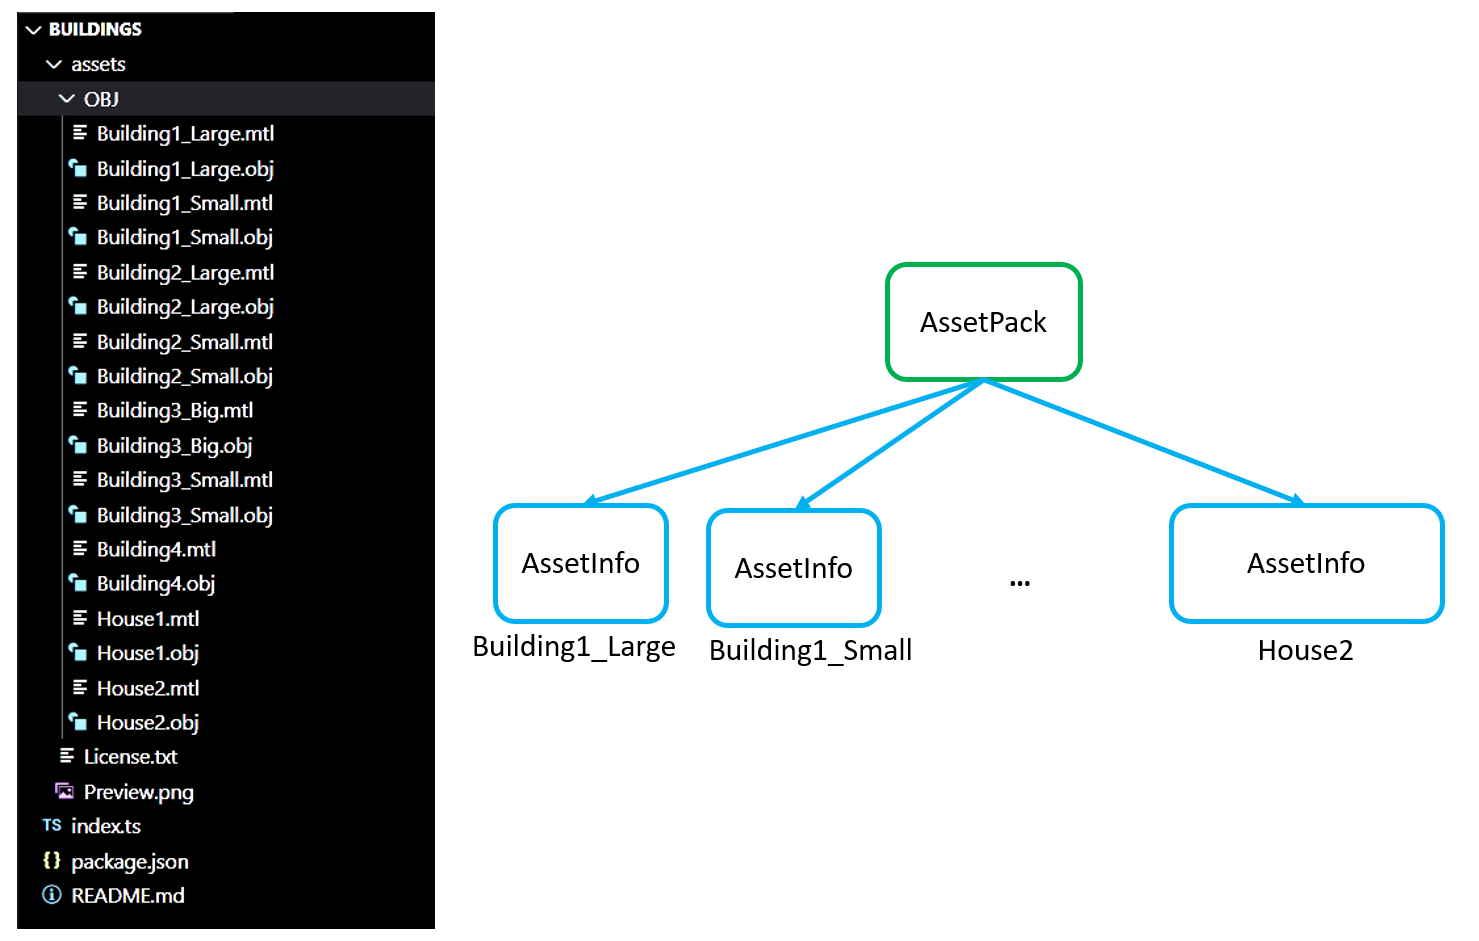
kheljs allows you to manage assets for your game efficiently and effecively by installing them as asset packs. The Asset packs allows you to load assets without having to use exact paths inside assets folder. Instead you load assets by names defined in the asset pack. An asset pack is nothing but an npm package which contains the following two artifacts:
- An index.ts, also called asset manifest file, which describes the assets in the asset pack.
- An assets/ folder that contains asset files like images, audio files, gltf files, obj files and so on - anything that can be loaded and used from your game. Asset files can be organized into any folder structure under the assets/ folder.
Since asset packs are just npm packages, they can be added and removed from your application just like any other npm packages. In addition, kheljs facilitates loading of assets from asset packs by providing a set of classes related to asset packs. The AssetPack class, for example, provides convenient methods to browse the list of assets and to read assets by name.

Managing asset packs in your game
To use an asset pack in your project, install it by executing the command kheljs asset-pack install as shown below. In this example, @idutta/my-fabulous-pack is name of the asset pack.
kheljs asset-pack install @idutta/my-fabulous-pack
This command will first install the asset pack into your project as an npm pakage and then will copy all asset files from the asset pack into the assets/ folder in your project. As a result, these asset files will now be available to your program.
To see the content of the asset pack execute the following command in your project folder;
kheljs asset-pack inspect @idutta/my-fabulous-packAsset Name:Male_CasualDescription:Male_CasualfilePath:GLTF/fileName:Male_Casual.glbAsset Name:Male_LongSleeveDescription:Male_LongSleevefilePath:GLTF/fileName:Male_LongSleeve.glb...
Anytime you do not want to use the asset pack in your project, you can uninstall it by executing the following command. This command will remove the asset files related to the asset pack from your project and then uninstall the npm package.
kheljs asset-pack uninstall @idutta/my-fabulous-pack
For any reason, if the assets/ folder in your project goes out of sync with the asset pack, you can copy the assets files again into your project as follows:
kheljs asset-pack sync @idutta/my-fabulous-pack
If you just simply want to get rid of the asset files from your project, you can execute the command
kheljs asset-pack clear @idutta/my-fabulous-pack
This will get rid of the files related to the asset pack from your project but will keep the asset pack installed. You can copy the assets back into your folder later with the kheljs asset-pack sync command.
Getting information about an asset pack from program
Once you got an asset pack installed in your project, you can get information about the assets in the pack simply by importing the asset pack. Importing the asset pack will return a manifest object which contains the description of the assets. Every asset in the asset pack is described by an AssetInfo structure and has a unique name in the pack. The followng shows a sample code on how to get information about assets in an asset pack.
import { manifest } from "@idutta/my-fabulous-pack";// create an asset pack objectlet assetPack = new AssetPack(manifest);// get the List of assets in the asset packlet assetInfos = assetPack.getAssets();// Get informaion about an asset by name and get its pathlet assetInfo = assetPack.getAssetInfo( "mig22" );console.log( "Asset path:" + assetInfo.filePath );console.log( "Asset name:" + assetInfo.fileName );console.log( "Full path:" + assetInfo.getFullPath() );
Loading assets from asset pack in program
The advantage of using AssetPack class is that you dont have to worry about asset paths in your code. All you have to do is to refer an asset in your asset pack by name and the AssetPack class will provide the right paths for you. The following example shows using the AssetLoader class to load assets.
import { manifest } from "@idutta/my-fabulous-pack";// create an asset pack object with the manifestlet assetPack = new AssetPack(manifest);// load an asset as a meshassetInfo = assetPack.getAssetInfo( "BigBuilding1" );new AssetLoader().loadMesh( scene, assetInfo, (loadedAssets) =>{// loadedAssets is a map with keys - meshes, particleSystems,// skeletons, animationGroups, transformNodes, geometries and// lights - all artifacts that was loaded from the asset...});// Load an asset as a textureassetInfo = assetPack.getAssetInfo( "groundTexture" );const material = new StandardMaterial( "mat", scene );material.diffuseTexture = new Texture( assetInfo.getFullPath() );
As you can see you dont have to worry about how the assets are organized inside an asset pack and how they are organized under the assets folder of your project. However, if needed, you can always get the path information about an asset from the corresponding AssetInfo object.