Install and run
The first step is to install kheljs cli tool globally on your computer:
npm install -g @kheljs/cli
if you have a version of @kheljs/cli already installed, you can upgrade to the latest version by executing
npm update -g @kheljs/cli
Once kheljs cli is installed globally on your computer you can execute the following command to generate a basic application.
kheljs generate project myGame
This will create a folder named myGame and generate source codes for the basic game. It will also install all required npm packages and asset packs for the basic game. To run the program execute the following commands from the command line. You can do the same from a Visual Studio Code terminal as well after opening the project folder from Visual Studio Code.
cd myGamenpm run serve
Access the game
The above command will start the webpack server in development mode and serve the application on port 5050. Open up a browser window and navigate to http://localhost:5050.

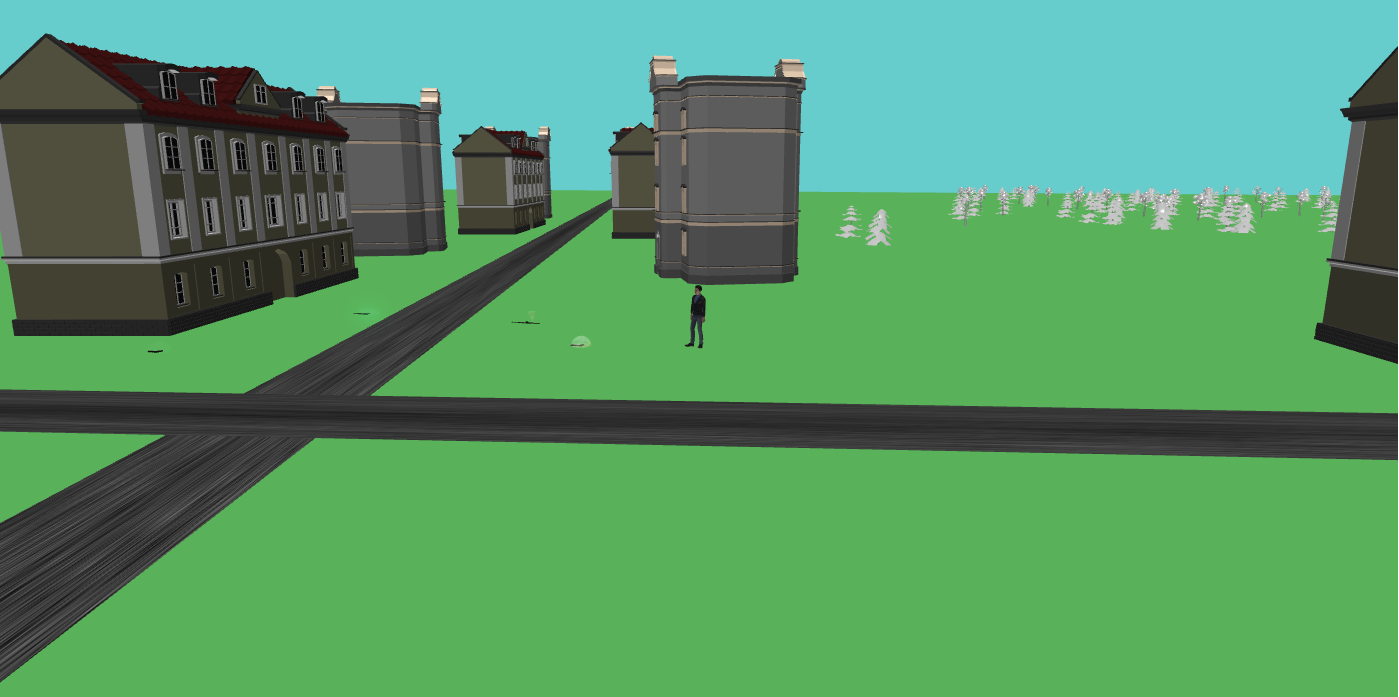
You will be able to see the basic game which contains the following:
- Planer ground with two roads
- A set of buildings arranged across the roads
- A set of trees randomly placed in different regions of the terrain.
- Player character who can walk around in reponse to arrow keys on the keyboard.
- Inventory items on ground which can be be picked up by the player.
Press the key "t" on your keyboard to toggle between scene camera and player camera. The player camera follows the player character while scene camera gives a bird eye view of the scene.
Use the arrow keys to move the player around. Walk the character near to a gun on the ground. You can pick up a gun by using the key "p" and wield it by using the "w" key. You can fire a pistol or rifle using the "f" key on your keyboard. You can unwield a gun by pressing the "u" key.
Pressing the "g" key will allow you to see the items acquired by player in the inventory panel. The active item appears with background green while the wielded item will appear with background red.
- p - to pickup
- w - to wield
- u - to unwield
- f - to fire
- g - to display GUI
- Escape - to hide GUI
- arrow keys - to move the character around.
Most of the objects placed in the scene can be changed and new items can be added just by adding new asset packs to the application and then changing the configuration in a few files. We will see how to do that in the section Modify the Basic Game
What to do next?
Now that you got the basic application up and running, you need to add more functionality to the game. You cant develop a good game overnight - it requires lots of planning and prepartion before you actually sit down to code. Among many things, you need to decide what assets you are going to use, how many levels you are going to create, whether xbox or playstation controller will be supported and so on.
The sections in this documentation are designed to help you create you dream game by adding functionality step by step. Go through the Conceptual Guide section to get an overall feel about the way the game components interact with each other. Also look at the folder structure to see how the generated code is organized. Best wishes and good luck!