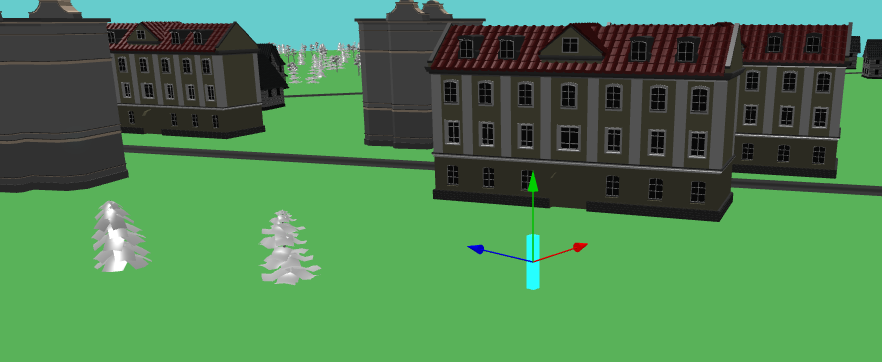
The TerrainManager Component
The TerrainManager class is responsible for creating the ground or terrain of the level and placing other objects in the terrain. The primary responsibilities of the TerrainManager are as follows:
- Creating the ground or the terrain for the game level.
- Arranging static objects like building, trees, etc in the terrain
- Divide the terrain into two or more regions and set ambient characteristics of each region
- Create collision boundaries to prevent player going into certain regions
kheljs framework provides a number of classes to help the TerrainManager component achieve its primary goals outlined above. In what follows, we will discuss these classes and also shows some examples how the default TerrainManager generated for a given level uses these classes.
Placing objects in the Terrain
All objects placed in the terrain are specified in the file named terrain-objects.ts. These files allows you to place individual items like houses, buildings etc in specified locations. It also allows you to randomly place objects like trees in a region. The generated application shows examples of both.
For each item specified in the terrain-objects.ts file, you have to specify the asset information, the location, transformations such as rotation and scaling. The asset for the terrain object can come from an asset pack or from a file. Using asset pack is most convenient as it does away with the need to manually copy asset files to your project folder. An example of a terrain-objects.ts file is shown below. In this example, the asset named Building1_Large is placed at a given location specified by the transform property and 4 clones are placed in locations specified by the cloneTransforms array. In the same example, 20 trees loaded from an asset identified by the name "Birch_1" are placed randomly in two regions.
import { manifest as buildings } from "@idutta2007/buildings";import { manifest as trees } from "@idutta2007/trees";const buildingAssetPack = new AssetPack(buildings)const treesAssetPack = new AssetPack(trees)export const terrainObjects: TerrainItemPlacementInfo[] = [{assetInfo: buildingAssetPack.getAssetInfoByName( "Building1_Large"),transform: { position: new Vector3(20, 0, 0), scaling: new Vector3(3.0, 3.0, 3.0) },cloneTransforms: [{ position: new Vector3(10, 0, 0) },{ position: new Vector3(50, 0, 50), rotation: new Vector3( 0, Math.PI/2, 0) },{ position: new Vector3(-50, 0, 20), rotation: new Vector3( 0, Math.PI/2, 0) },{ position: new Vector3(100, 0, 20), rotation: new Vector3( 0, Math.PI/2, 0) },]},{assetInfo: treesAssetPack.getAssetInfoByName( "Birch_1"),transform: { position: new Vector3(30, 0, 0), scaling: new Vector3(1.0, 1.0, 1.0) },cloneTransforms: TerrainTransformGenerator.generateRandomTransforms([new Region( -60, 30, 60, 50 ),new Region( -60, 100, 60, 300 ),],20)},...]
Using the human sized box.
You can create a human sized box in your scene by calling the method:
MeshHelper.createHumanSizedBox(scene);
As the name suggests, this method creates a human sized box i.e. a box of size 1x6x1 to represent a 6 feet tall human being. This box is displayed with gizmos so that it can be moved around the scene.

The human box provides a reference for size to other objects on the scene like buildings, cars, trees etc and allows you to scale them appropriately so that their sizes look natural relative to a human.
Apart from acting as a reference for size in the scene, the humanBox also allows placing objects on the terrain accurately because it can be moved anywhere using the gizmo and its position can be read from the console window.
To position the human box anywhere on the scene, do the following:
- First switch to scene view by pressing the key "t" on keyboard.
- Once you are in scene view press the "y" key to lock the scene camera to the human box.
- Move the human box to any desired location on the scene using the gizmos.
- Go to Javascript console window and type in humanBox.position and press return to see the current position of the human box. You can use this position to place any terrain object in that location.
Viewing terrain object information while debugging
The TerrainManager maintains the list of all items created on the terrain as a list of TerrainItem objects. When running the application in devlopment mode , this list is available for inspection from the javascript console window as the variable named "terrainItems". All meshes loaded for terrain objects are tagged with the string "terrain-mesh".